Physical Address
304 North Cardinal St.
Dorchester Center, MA 02124
Physical Address
304 North Cardinal St.
Dorchester Center, MA 02124
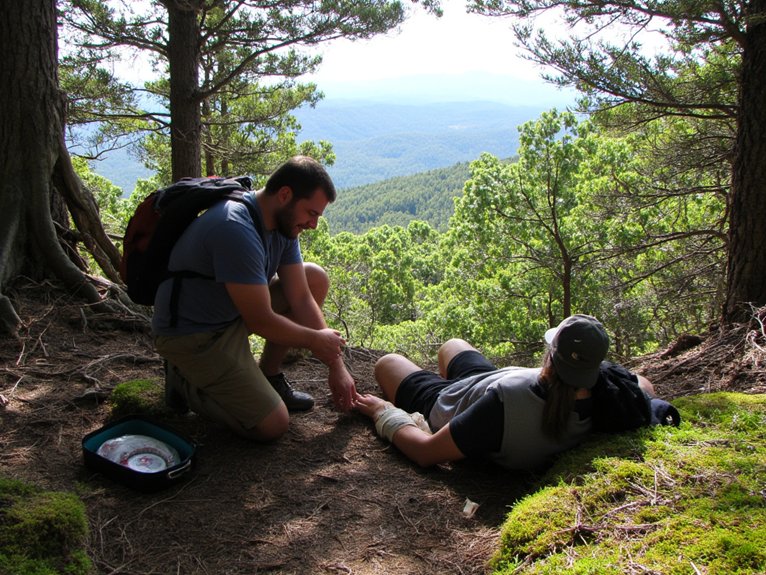
Imagine you’re ten miles deep on a mountain trail when your hiking partner slips and breaks their ankle. No cell service, no nearby rangers, and at least six hours from civilization. What now? Wilderness first aid isn’t about sterile environments or immediate ambulance transport—it’s about making critical decisions with limited resources when professional help isn’t coming anytime soon. You’ll need to assess, improvise, and manage both the injury and the mounting environmental challenges. Ready to learn how?

When you’re miles from civilization with limited resources, your mindset becomes your most valuable wilderness first aid tool. The ability to stay calm while methodically evaluating a situation can mean the difference between panic and proper care. First, conduct a thorough risk assessment—evaluate the patient, environment, and available resources before taking action.
Mental resilience isn’t just nice to have; it’s essential. You’ll face challenging decisions without the luxury of second opinions or advanced equipment. Remember, wilderness medicine isn’t about perfect solutions—it’s about making the best possible choices under difficult circumstances. Sometimes that means improvising a splint from trekking poles or deciding when moving a patient outweighs the risks of staying put. Trust your training, but remain adaptable. The wilderness doesn’t follow textbook scenarios.

When heading into the backcountry, you’ll need a well-stocked medical kit that includes three essential categories of supplies. Your kit should contain medications and treatments like pain relievers, antihistamines, and topical antibiotics to address common wilderness ailments. Don’t forget vital tools and equipment such as tweezers, trauma shears, and a CPR mask, which can make the difference between effective care and helplessness when you’re miles from professional help.
Since you’ll be miles from the nearest pharmacy or hospital, assembling the right medications and treatments for your backcountry medical kit isn’t just convenient—it’s potentially lifesaving. Proper medication storage is critical—keep pills in waterproof containers labeled with dosages and expiration dates. Extreme temperatures can degrade medications, so insulate your kit when possible.
Learn basic treatment protocols before heading out. Know when to use your antihistamines for allergic reactions versus your NSAIDs for pain and inflammation. Include versatile items like honey (nature’s antibiotic) and duct tape (makeshift bandage). Trust me, I’ve turned a bandana and duct tape into a surprisingly effective ankle wrap!
Every wilderness medical kit requires three essential tool categories for a thorough emergency response capability. First, you’ll need diagnostic tools: a reliable thermometer, penlight, and blood pressure monitor if possible. Second, gather treatment implements including trauma shears (crucial for quickly cutting away clothing from injuries), tweezers for splinter removal, and portable splints that can immobilize fractures until proper care is available. I’ve found compact SAM splints to be worth their weight in gold on the trail! Finally, don’t forget utility items like safety pins, duct tape, and waterproof matches. The best kits balance exhaustiveness with practicality—you can’t carry a hospital on your back. Remember, these tools are only effective when you know how to use them, so pair your gear with proper training.
Proper protection of wounds in the backcountry can mean the difference between a minor setback and a trip-ending emergency. Your kit should include sterile gauze pads (2×2 and 4×4 inches), adhesive bandages in various sizes, and medical tape that sticks when wet. Don’t forget elastic wrap bandages—they’re invaluable for sprains and securing dressings.
For protective gear, pack a few pairs of nitrile gloves to prevent infection transmission (yours or theirs). Triangle bandages serve multiple functions, from arm slings to pressure bandages. Master basic bandaging techniques like the spiral, figure-eight, and pressure bandage before you need them on the trail. Unlike your neighborhood scrape, wilderness wounds need extra attention to cleanliness and protection from the elements. Practice now—you’ll thank yourself later.

When you’re miles from the nearest hospital, your first task is to quickly distinguish life-threatening emergencies from minor injuries through primary and secondary surveys. You’ll need a systematic approach to determine evacuation priorities—whether to call in a helicopter, walk someone out, or treat in place—using a decision matrix that weighs injury severity against available resources and environmental conditions. In wilderness settings, you’re often forced to make tough triage decisions with limited supplies, meaning that textbook protocols might need creative adaptation when you’re treating multiple patients with a single roll of tape and dwindling daylight.
In wilderness medicine, distinguishing between primary and secondary surveys isn’t just recommended—it’s essential for effective patient care. When you’re miles from help, your assessment approach must be methodical yet adaptable. Primary surveys focus on life-threatening conditions, while secondary surveys examine the complete patient picture.
Your wilderness assessment sequence should follow:
Medical ethics demands you provide care within your training limits while prioritizing injury prevention. This two-tiered approach helps you distinguish between “must treat now” and “can monitor” situations. Remember, in the backcountry, knowing when to stop the assessment and start moving toward definitive care often makes all the difference.
Determining whether to stay put or initiate evacuation stands as the most critical decision you’ll face in wilderness first aid emergencies. To make this judgment call with confidence, use an evacuation priority matrix that objectively evaluates patient condition against environmental factors. This structured approach clarifies rescue sequencing when multiple victims need care.
| Urgency Level | Patient Condition | Response Needed |
|---|---|---|
| Critical | Life-threatening | Immediate evacuation, even with risks |
| Urgent | Stable but deteriorating | Evacuation within hours; careful monitoring |
| Non-urgent | Stable, non-life-threatening | Self-evacuation or continued monitoring |
Unlike traditional hospital settings where help is abundant, wilderness triage requires you to make difficult decisions with minimal equipment and personnel. When facing multiple injuries with limited resources, you’ll need to quickly assess who needs care first—a process called triage prioritization. In remote settings, this becomes even more critical.
Here’s how to approach wilderness triage:

When you’re deep in the wilderness, life-threatening emergencies require swift, decisive action that can mean the difference between survival and tragedy. Whether facing unexpected wildlife encounters or dealing with an injured hiker who’s lost due to navigation challenges, you’ll need to prioritize ABCs: airway, breathing, and circulation.
Don’t panic! Your backpack isn’t an ER, but it’s your lifeline. For severe bleeding, apply direct pressure—that $20 bandana might save a life. For chest injuries, seal wounds with plastic wrap from your lunch. Hypothermia kills quickly; strip wet clothes and share body heat.

Despite the life-threatening emergencies we’ve just covered, you’re far more likely to encounter common injuries that, while not immediately fatal, can quickly derail your wilderness adventure. Treating these conditions effectively requires preparation and knowledge.

Beyond the injuries that result from accidents and mishaps, the environment itself can pose serious threats to your safety in the backcountry. Understanding these environmental hazards is vital for outdoor safety, especially when you’re miles from help. I’ve seen seasoned hikers caught unprepared when weather shifts suddenly.
| Condition | Symptoms | First Aid | Prevention | Evacuation? |
|---|---|---|---|---|
| Hypothermia | Shivering, confusion | Warm dry clothes, hot drinks | Proper layers, stay dry | If severe |
| Heat Exhaustion | Sweating, nausea | Cool, hydrate, shade | Hydration, sun protection | If progressing |
| Heat Stroke | Hot dry skin, confusion | Immediate cooling | As above, plus rest | Always |
| AMS | Headache, nausea | Descend, rest | Acclimatize slowly | If worsening |
| HAPE/HACE | Shortness of breath, ataxia | Immediate descent | Proper acclimatization | Always |

In the backcountry, where medical supplies are limited and help is often hours or days away, your ability to improvise can mean the difference between life and death. You’ll need to get creative with whatever resources you have on hand. Nature and your gear can provide surprising solutions when properly utilized.
Here are four essential improvisation techniques for wilderness emergencies:

When you’re faced with an injured person in the wilderness, determining whether to evacuate—and how—becomes one of your most critical decisions. Evacuation timing depends on injury severity, weather conditions, and available resources. Trust your gut; if you’re uncertain, it’s usually better to evacuate.
For serious injuries (uncontrolled bleeding, spinal damage, or altered consciousness), begin rescue coordination immediately. Don’t wait until dark! Use cell phones when possible, satellite devices when necessary, and pre-arranged check-in systems as backup.
Before moving anyone, consider: Will movement worsen the injury? Can you safely transport them? What’s your best route out? Improvised stretchers (using poles and jackets) work for level terrain, while piggyback carries suit conscious patients with lower limb injuries. Remember, a bad carry can turn a moderate injury into a life-threatening one!

How can you prepare yourself to handle wilderness emergencies with confidence? Training is essential for anyone venturing into remote areas where professional help might be hours—or days—away. Wilderness first aid requires specialized knowledge that goes beyond basic first aid.
For dental trauma, rinse with clean water, manage pain with NSAIDs, control bleeding with gauze, and reinsert knocked-out teeth if possible. Maintain basic oral care until professional help is available.
Yes, your medications can lose stability in extreme wilderness conditions. You’ll need proper wilderness drug storage techniques—keep them sealed, dry, protected from temperature extremes, and in original containers whenever possible.
For chronic conditions in backcountry trips, you’ll need proper medication storage tips—keep pills dry in waterproof containers and manage chronic pain through regular doses, stretching, and adequate rest between activities.
You’re potentially facing legal liability when treating others. Always obtain consent before providing care, document your actions, and stay within your training’s scope to minimize risks.
You’ll need clear emergency communication. Document essential signs, treatments given, and patient history. Use simple language, prioritize critical information, and maintain chronological medical documentation for rescue teams.