Physical Address
304 North Cardinal St.
Dorchester Center, MA 02124
Physical Address
304 North Cardinal St.
Dorchester Center, MA 02124
When the power grid fails and your GPS can’t find a signal, those medical skills you’ve neglected might suddenly mean life or death. You’ve stockpiled food and ammo, but can you stop arterial bleeding or recognize the early signs of infection? I’ve seen preppers with bug-out bags full of gadgets who couldn’t properly clean a simple wound. The difference between survival and tragedy often boils down to these twelve critical medical abilities that don’t require an MD.

When chaos erupts and medical help isn’t immediately available, your ability to assess wounds and control bleeding can mean the difference between life and death. Understanding basic blood vessel anatomy helps you identify whether you’re dealing with arterial bleeding (bright red, pulsing) or venous bleeding (darker, steady flow).
You’ll need to master several wound dressing techniques depending on the injury. For minor cuts, direct pressure with a clean cloth works fine. For more severe wounds, you might need pressure bandages or even a tourniquet as a last resort. Remember, tourniquets aren’t as scary as they sound—they’ve saved countless lives in combat zones! Always clean the wound first when possible, apply appropriate pressure, elevate the injured area, and secure your dressing properly. Your quick action could save someone’s life.

You’re about to learn three vital skills that could mean the difference between life and death when medical help isn’t available. Proper chest compression technique forms the foundation of effective CPR, with rescue breathing providing essential oxygen to a non-responsive victim’s system. While manual techniques are essential, understanding how to use an automated external defibrillator (AED) can dramatically increase survival rates for cardiac arrest victims—even in off-grid situations where the device is available.
How effectively you perform chest compressions can literally mean the difference between life and death in a crisis situation. When you’re performing CPR techniques, position yourself directly over the victim with your shoulders aligned above your hands. Place the heel of one hand on the center of the chest, between the nipples, and your other hand on top.
Lock your elbows and use your body weight—not just arm strength—to compress the chest 2-2.4 inches deep. Maintain a rate of 100-120 compressions per minute (think “Stayin’ Alive” by the Bee Gees—not kidding, it’s the perfect tempo). Allow complete chest recoil between compressions; don’t lean on the chest. Remember, proper chest compression delivers oxygen to the brain when the heart can’t. It’s exhausting work, but you’re fundamentally becoming their heartbeat.
Rescue breathing, though often overshadowed by chest compressions, remains a essential component of effective CPR in survival situations where medical help isn’t readily available. You’ll need to deliver two rescue breaths after every 30 compressions, ensuring the chest visibly rises with each breath. Pinch the nose, tilt the head back slightly, and create a proper seal over the mouth.
Alternative airway management becomes indispensable when standard rescue breathing techniques aren’t feasible. You might encounter cases where the victim’s mouth is injured or contaminated. In these scenarios, consider mouth-to-nose breathing or, if you’ve got them, use pocket masks or face shields. These barriers protect you while delivering effective ventilation. Remember, your exhaled breath contains enough oxygen (16%) to sustain someone in crisis—it’s not ideal, but it’s far better than nothing.
While rescue breathing operates as the “breath of life” in CPR, automated external defibrillators (AEDs) serve as the “reset button” for a heart in crisis. These life-saving devices are surprisingly intuitive, even for beginners. Proper AED operation requires confidence and quick action, not medical expertise.
For successful electrode placement and use:

When you’re faced with a fracture in a grid-down scenario, proper immobilization becomes your first line of defense against worsening the injury. Remember the “RICE” protocol—rest, ice, compression, elevation—but splinting is your critical next step. Effective fracture immobilization prevents bone ends from causing further damage to surrounding tissues.
For splinting techniques, use what’s available: magazines, sticks, even a rolled blanket will work in a pinch. The golden rule? Immobilize the joints above and below the fracture site. Measure twice, apply once. A poorly fitted splint is worse than none at all.
I’ve used everything from cardboard to tree branches in emergency situations. Trust me, your patient won’t care about aesthetics—they’ll be grateful you’ve stabilized that excruciating bone break until proper medical help arrives.

How quickly you respond to burn injuries can mean the difference between recovery and life-threatening complications. I’ve seen firsthand how proper initial treatment preserves tissue and reduces scarring. Your priority? Cool the burn, not freeze it.
When treating burns, follow these critical steps:

Recognizing a respiratory emergency requires your immediate action, as oxygen deprivation can cause permanent brain damage within minutes. When faced with airway obstruction or breathing difficulties, you’ll need to assess and respond with confidence. Clear the airway first, then determine if rescue breathing or CPR is necessary.
| Emergency Type | Signs | Your Response |
|---|---|---|
| Choking | Clutching throat, can’t speak | Heimlich maneuver; 5 back blows |
| Asthma Attack | Wheezing, chest tightness | Help with inhaler; sitting position |
| Airway Obstruction | Blue lips, unconsciousness | Head tilt-chin lift; finger sweep |
I’ve treated dozens of respiratory emergencies, and trust me—staying calm is half the battle. Practice these techniques regularly; you don’t want your first attempt to be during a real crisis.

Shock can sneak up on you silently in the wilderness, striking when medical help is hours or days away from your location. Recognizing wilderness shock early might save a life—possibly your own. I’ve seen seasoned hikers collapse from it after seemingly minor injuries. The key shock symptoms include cool, clammy skin, rapid pulse, and confusion.
When managing wilderness shock, prioritize these critical steps:

Preventing infection in a grid-down scenario starts with proper wound cleaning—you’ll need to thoroughly irrigate wounds with clean water and remove any visible debris before applying antiseptics. When commercial antibiotics aren’t available, you can turn to natural alternatives like honey, garlic, or oregano oil, which have proven antimicrobial properties in studies. Remember that the best treatment is prevention: keeping wounds clean and covered, practicing good hygiene, and using sterile techniques whenever possible will save you from fighting infections you could’ve avoided.
When disaster strikes and medical help isn’t readily available, your ability to properly clean a wound could be the difference between quick healing and a life-threatening infection. Understanding basic sterile techniques isn’t just for medical professionals—it’s essential knowledge for any prepared individual. You’ll need to master proper wound cleaning long before you worry about wound dressing.
Follow these steps for effective wound cleaning:
In a world without reliable access to prescription medications, you’ll need to understand nature’s pharmacy for preventing and treating infections. Natural antibiotics have been used for centuries before modern medicine, and they’re surprisingly effective. I’ve treated minor infections with these herbal remedies during extended backpacking trips when professional care wasn’t available.
| Natural Antibiotic | Uses | Application Method |
|---|---|---|
| Garlic | Broad-spectrum antimicrobial | Crushed and applied as poultice |
| Honey | Wound infections, burns | Direct application to wound |
| Tea Tree Oil | Fungal infections, minor cuts | Diluted and applied topically |

During emergency situations where conventional healthcare is unavailable, your ability to create improvised medical supplies from everyday items can mean the difference between life and death. I’ve learned through years of prepping that resourcefulness trumps stockpiling every time. You’d be surprised how many medical supplies you can create from household items.
Here are three essential improvised supplies you should master:
Don’t wait for disaster to practice these skills!

Making your own supplies is just part of medical preparedness; now you’ll need to keep those items clean and infection-free. Proper field sterilization techniques can mean the difference between healing and causing harm.
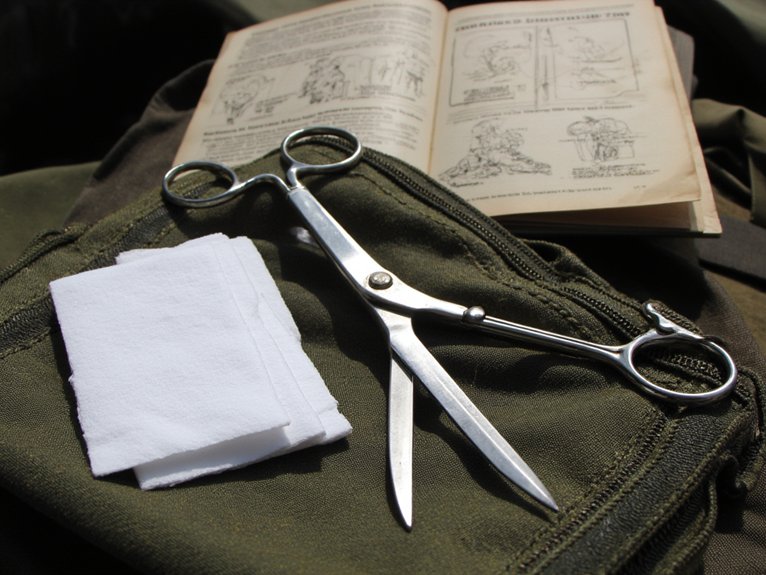
In survival situations, you’ve got three reliable options: heat, chemicals, or UV light. Metal sterilization tools like forceps and scissors can be passed through flame for 30 seconds or boiled for 20 minutes. For contamination prevention, don’t forget to clean items before sterilizing—dirt protects bacteria!
Alcohol (70% isopropyl) works wonders for surfaces and skin, while chlorine bleach solution (1:10 ratio) handles most everything else. No chemicals? The sun’s UV rays can disinfect clear water in six hours—nature’s backup plan. Remember, sterilization isn’t just medical geekery; it’s your invisible shield against infection when hospitals are just wishful thinking.

When conventional medicine becomes unavailable, you’ll need alternative pain management strategies that don’t rely on prescription medications. I’ve used these methods myself after a backcountry accident, and they’re surprisingly effective. Alternative therapies like acupressure can provide immediate relief when properly applied.
How quickly can dehydration become life-threatening in a crisis situation? Within just 72 hours, your body can shut down without proper fluids. You’ll deteriorate even faster if you’re injured, vomiting, or experiencing diarrhea.
Maintaining electrolyte balance is non-negotiable. Don’t just drink water—you need sodium, potassium, and magnesium too. Mix 6 teaspoons sugar, ½ teaspoon salt, and 1 liter of clean water for a DIY rehydration solution that’ll keep you functioning when commercial options aren’t available.
Smart hydration strategies include collecting morning dew on plastic sheets, extracting moisture from plants, and utilizing solar stills. Remember, your urine should be pale yellow—darker means trouble’s brewing. When food’s scarce, prioritize proteins and fats over carbs. They’ll keep your energy stable longer, which might make the difference between survival and, well, the alternative.
Moving an injured person improperly can transform a manageable wound into a life-threatening emergency—why risk it? Mastering evacuation planning before disaster strikes could save precious minutes when seconds count. I’ve seen makeshift stretchers fail catastrophically during transport, so trust me on this one.
Consider these patient movement essentials:
Remember: the smoothest evacuation happens when you’ve rehearsed it. Your back and your patient will thank you.
You’ll need to stay calm for a home birth. Make certain cleanliness, help mom push, catch baby, clear airways, cut cord. Emergency cesarean isn’t recommended without medical training.
Teach your kids basic first aid including wound cleaning, bandaging, and CPR. They should learn emergency communication skills—how to call for help and clearly describe injuries or situations.
You’ll need to recognize fever patterns and symptoms, practice antibiotic stewardship, and understand disease transmission routes. Learn when to isolate patients and when medical intervention is absolutely necessary.
You can salvage medical equipment from abandoned facilities, but you’ll need proper salvage techniques. Always sterilize equipment thoroughly—high-pressure steam or chemical methods work best for contaminated items.
During psychiatric emergencies, you’ll need crisis intervention skills. Stay calm, listen actively, remove triggers, and create a safe space. Don’t forget your own mental health when helping others in disaster situations.