Physical Address
304 North Cardinal St.
Dorchester Center, MA 02124
Physical Address
304 North Cardinal St.
Dorchester Center, MA 02124
You’re never truly prepared for survival situations until you’re forced to face one. That fancy smartphone won’t help when you’re lost without reception, and your emergency kit is worthless if you don’t know how to use it. I’ve seen too many outdoor enthusiasts rely on gear rather than knowledge—a potentially fatal mistake. The twelve survival skills we’ll examine aren’t just wilderness tips; they’re your insurance policy against the unexpected tomorrow might bring.

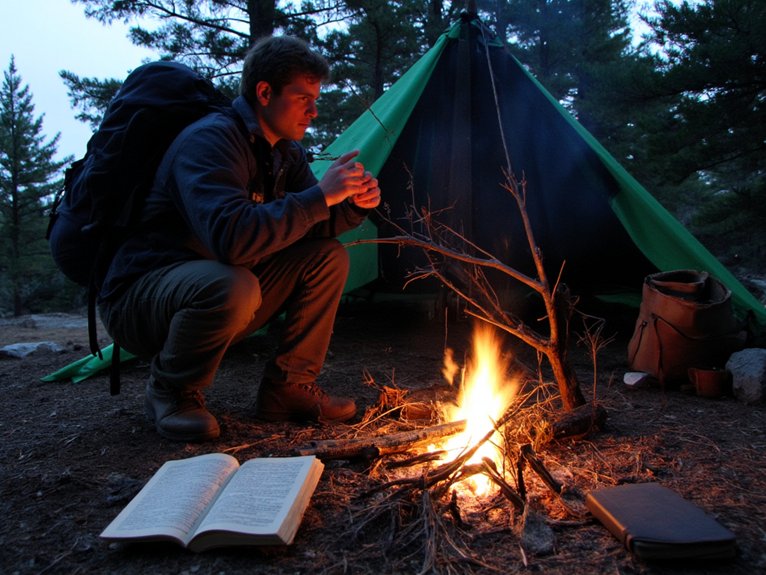
When you’re stranded in the wilderness without modern fire-starting tools, you’ll need to rely on primitive methods that have served humanity for thousands of years. The hand drill method—rotating a wooden spindle between your palms against a fireboard—creates friction and, eventually, an ember. It’s exhausting but effective.
Alternatively, the bow drill uses a simple bow to rotate the spindle, giving you mechanical advantage. Remember, even without fire, you’ve got options for fireless cooking, like solar cooking using reflection or fermentation methods.
While mastering these techniques, don’t overlook fire prevention techniques. Always clear a five-foot area around your fire pit, keep water nearby, and never leave flames unattended. Trust me, I’ve seen beautiful campsites turn dangerous in minutes when winds shifted unexpectedly.

How long can humans survive without water? Three days, maximum—and that’s pushing it. You’ll need water collection skills before dehydration sets in, which happens faster than you’d think.
In forests, collect morning dew from large leaves using cloth. Desert environments? Look for cacti and dig solar stills—simple pits covered with plastic that trap evaporating moisture. Near mountains, follow animal trails downhill; they often lead to water sources.
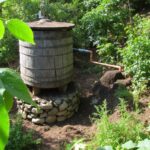
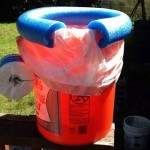
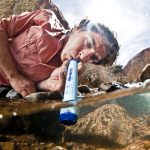
But finding water isn’t enough—it must be safe. Water filtration is non-negotiable. Without commercial filters, layer cloth, sand, charcoal, and gravel in a container with holes at the bottom. Still, boil filtered water for at least one minute (three minutes at high elevation). Remember, clear doesn’t mean clean! Parasites and bacteria are invisible hitchhikers your naked eye can’t spot.

When you’re stranded in the wilderness without modern shelter, your survival often depends on quickly constructing protection using whatever materials nature provides. You’ll need to master three essential emergency shelter types — the lean-to (perfect for rainy forests), the snow cave (your winter lifesaver), and the debris hut (nature’s insulated cocoon). These shelters aren’t just convenient camping alternatives; they’re temperature-regulating, weather-shielding lifelines that can mean the difference between hypothermia and making it through the night to see another sunrise.
Among the most essential wilderness survival skills you’ll ever master, building a lean-to shelter stands at the top of the list. It’s your first line of defense against exposure, which kills faster than thirst or hunger in harsh conditions. The basic structure consists of a ridgepole supported by two trees or sturdy sticks, with angled supports creating your shelter’s backbone.
Proper insulation techniques make all the difference between comfort and misery. Layer your roof materials—starting with larger branches, then progressively smaller ones, topped with leaves, moss, or pine needles—at least 4-6 inches thick. This creates a waterproof barrier that traps body heat. For shelter durability, don’t skimp on your frame. Test each support before trusting your life to it; a collapsed shelter won’t keep you alive when you need it most.
Surviving in snow environments means mastering the counterintuitive skill of using snow itself as insulation against deadly cold. When compacted, snow traps air pockets that provide remarkable thermal protection—much like your home’s fiberglass insulation, but free and abundant.
Start by digging into a drift at least 5 feet deep, hollowing upward to create a dome. This shape prevents ice formation on the ceiling that could drip onto you during sleep (trust me, that’s miserable). I’ve learned that proper snow cave ventilation is non-negotiable—carve a small hole near the top and keep your entrance lower than your sleeping platform. This allows deadly carbon dioxide to escape while warm air stays trapped inside. Your body heat alone can raise the interior temperature to a surprising 32°F when properly constructed.
The humble debris hut stands as nature’s free emergency accommodation when snow isn’t available for shelter construction. You’ll need to find a sturdy ridgepole—about 8 feet long—and prop it against a tree or stump at waist height. That’s your backbone.
Now comes the fun part: gather sticks to create a ribcage along both sides, leaving a small entrance. Layer leaves, pine needles, and other debris about 2-3 feet thick over this framework. Don’t skimp here; your insulation determines survival. The interior should be just large enough for your body, maximizing heat retention.

In a survival situation, knowing how to handle injuries can mean the difference between life and death—starting with controlling severe bleeding through direct pressure, elevation, and improvised tourniquets. Burns require immediate cooling with clean water (not ice), removal of jewelry near the affected area, and covering with sterile dressings or clean cloth if medical supplies aren’t available. You’d be surprised what everyday items can become medical tools: clean t-shirts make excellent bandages, duct tape works for securing dressings, and credit cards can scrape out splinters or flatten to become splints when paired with sticks.
Life-threatening bleeding can kill you in under five minutes, which is why it’s often your first priority in any medical emergency. I’ve seen minor cuts become serious situations when not addressed properly. Your first aid kits should always include trauma-specific items: tourniquets, pressure bandages, and hemostatic gauze.
When faced with severe bleeding, remember the ABC approach: Apply direct pressure, Bring the wound above heart level, and Compress with a tourniquet if bleeding doesn’t stop. Those precious survival gear items can make the difference between life and death. Trust me, a properly applied tourniquet hurts like hell—but it beats the alternative!
Don’t waste time looking for something “clean” in a true emergency. That t-shirt you’re wearing? It’ll work better than nothing while you’re scrambling for proper supplies.
How quickly you act when treating burns often determines the severity of long-term damage. First, cool the burn under lukewarm (not ice-cold) running water for 10-20 minutes—I’ve seen this simple step prevent countless scars. Remove jewelry and tight clothing before swelling sets in.
For proper burn treatment, never apply butter, oil, or toothpaste—these old wives’ tales can trap heat and cause infection. Instead, after cooling, apply a thin layer of aloe vera gel or antibiotic ointment before covering with sterile, non-adherent wound dressing. Burns larger than your palm, those on the face or genitals, or any that have charred or white appearance need immediate medical attention. Trust me, it’s better to look slightly paranoid at the ER than to risk permanent damage.
When proper medical supplies aren’t available, everyday items can save lives in emergencies. A clean t-shirt becomes bandages when cut into strips, while duct tape secures improvised dressings and can even close small wounds. Honey isn’t just for tea—it’s a natural antibacterial that prevents infection when applied to cuts.
Your medical supplies alternatives might be hiding in plain sight. Super glue can substitute for stitches in a pinch (doctors use medical-grade versions). Clean plastic bags make protective covers for burns or wounds, and tampons expand to plug deep bleeding injuries. For improvised first aid, remember that dental floss makes surprisingly strong suture material, while credit cards become splints for fingers. Even everyday salt dissolved in water creates a solution for cleaning wounds when antiseptics aren’t available.

Before modern technology made navigation as simple as tapping a screen, humans relied on timeless methods that you’ll find invaluable if your devices fail during an emergency.
Compass navigation remains the cornerstone of wilderness travel, requiring only a basic understanding of magnetic north and map reading. Keep a quality compass in your survival kit—it’s lightweight and never needs charging. For nighttime orientation, celestial navigation is your ancient ally. The North Star (Polaris) stays fixed above the North Pole, while the Southern Cross points toward the South Pole. During daylight, you can fashion a crude compass by placing a needle on a leaf in water after magnetizing it with silk or hair. Remember: moss often grows on the north side of trees in the northern hemisphere—nature’s subtle directional hint when you’re truly lost.

When you’re hungry in the wilderness, knowing which plants won’t kill you becomes your new superpower, but rushing to eat anything green could be your last meal. You’ll want to master the Universal Edibility Test—a systematic process of skin contact, lip testing, and tiny taste samples spread over 24 hours—before committing to any unfamiliar plant. Watch out for deadly mistakes like confusing water hemlock for Queen Anne’s lace, or mistaking poisonous lily-of-the-valley berries for blueberries—mistakes I’ve seen even experienced foragers nearly make.
How can you determine if that unfamiliar plant might be your next meal or your last mistake? When you’re stranded in the wilderness, the universal edibility test becomes your best friend. This methodical approach to plant safety could literally save your life.
First, separate the plant into components—leaves, stems, roots—and test each part individually. Fast for eight hours, then touch a piece to your outer lip for three minutes. No reaction? Place it on your tongue for 15 minutes without swallowing. Still good? Chew a tiny bit but don’t swallow. Wait another eight hours. If no rashes, nausea, or burning occur, swallow a small portion and wait 24 hours before eating more.
The wilderness offers plenty of edible plants for survival, but it’s also home to dangerous lookalikes that could quickly turn your foraging expedition into a medical emergency. Distinguishing these toxic lookalikes from their edible counterparts is a critical skill. I’ve seen experienced foragers mistake deadly nightshade for blueberries—a mistake you can’t afford to make.
| Edible Plant | Toxic Lookalike | Key Differences |
|---|---|---|
| Blueberries | Pokeweed berries | Pokeweed has dark purple-black berries on pink stems |
| Wild Onion | Death Camas | Wild onion smells like onion; death camas doesn’t |
| Chickweed | Deadly Nightshade | Nightshade has bell-shaped flowers and shiny berries |

Imagine you’re stranded in the wilderness without a phone, miles from civilization – what’s your plan to alert rescuers to your location? Your survival might depend on mastering two critical signaling methods.
Signal mirrors are remarkably effective, capable of flashing sunlight up to 10 miles away on clear days. You’ll want to aim by forming a peace sign with your fingers, positioning your target in the gap, then flashing the reflection through that space. Don’t have a mirror? A credit card, watch face, or even a soda can bottom works in a pinch.
For whistle signaling, remember the universal distress pattern: three short blasts, pause, repeat. A whistle carries much further than your voice and won’t leave you hoarse after hours of use. Smart hikers always pack one.

When you’ve depleted your emergency rations, nature’s supermarket awaits—if you know where to shop. I’ve survived three days on foraged foods alone, and trust me, knowing the difference between dinner and danger is vital. Wild edible mushrooms like morels can sustain you, but misidentification can be fatal.
| Food Source | Identification Tips | Danger Level |
|---|---|---|
| Morel mushrooms | Honeycomb texture, hollow stem | Low if properly identified |
| Figure-four trap | Uses trigger stick system | Medium (knife required) |
| Deadfall trap | Heavy rock or log as weight | High (practice needed) |
| Snare trap | Wire loop that tightens | Medium (wire required) |
Animal trapping techniques vary in complexity. The simplest snare can catch small game overnight, while you’re conserving energy for the challenges ahead.

Mastering a few key knots isn’t just useful—it’s often the difference between life and death in survival situations. Proper rope selection is your first step; natural fibers work well when dry, but synthetic cords resist water damage. After twenty years of wilderness training, I’ve found these knots consistently save the day:

While knots secure what you’ve already got, the wilderness itself offers an abundance of raw materials for crafting tools you’ll need. Finding the right stone for cutting, or a sturdy branch for a walking stick, isn’t just clever—it’s survival.
You’ll want to practice creating basic implements: stone knives (sharpen against another rock), digging sticks (fire-harden the tip), and containers from large leaves or bark. Remember, natural resource conservation matters even in emergencies. Don’t strip an area bare; take only what you need.
The environmental impact of your tool-making should be minimal. A fallen branch works just as well as one you’ve cut, and causes less damage. Nature’s hardware store is impressively stocked—you just need to know how to shop there without leaving the shelves empty for the next customer.
In wilderness situations, your ability to assess threats accurately can mean the difference between life and death. The same skills apply in urban environments too. I’ve found that developing urban awareness helps you spot potential dangers before they become life-threatening. Threat recognition isn’t just about animals—it includes weather, terrain, and sometimes other humans.
You’ll need different strategies for different threats. A charging moose requires different tactics than an approaching storm. Remember, good self-defense starts with avoiding situations where you’d need to defend yourself in the first place.
When panic seizes your mind during emergencies, your survival chances plummet dramatically. Your body floods with adrenaline, clouding judgment when you need it most. I’ve seen trained soldiers freeze completely during their first real crisis—it happens to the best of us.
Developing stress management skills is non-negotiable for survival scenarios. Start with the 4-4-4 technique: breathe in for four seconds, hold for four, exhale for four. It’s ridiculously simple but works like magic to restore emotional control.
Prioritize skills based on your environment. You’ll need survival gear knowledge first, followed by wilderness navigation. Focus on shelter, water, and fire before advanced techniques for your specific region.
You can teach children survival techniques through age-appropriate learning methods. Start with simple skills, emphasize child safety, and make it fun so they’ll actually remember when needed.
You’ll want to practice survival skills quarterly for basic skill refreshment, with more complex techniques requiring monthly practice frequency. Don’t wait until you’re in danger to refresh your abilities.
In urban emergency situations, you’ll need navigation skills, water purification, and first aid knowledge. Urban preparedness includes knowing evacuation routes, while emergency communication devices help you stay connected when systems fail.
In cold weather, your priority is preventing heat loss and hypothermia. In hot environments, you’ll need to focus on hydration, shade, and preventing heat exhaustion through proper rest periods.